 A step by step turorial on how I constructed my Broadsides. The conversion is not very difficult but requires a lot of time and work.
Step 1: Ressources
I had for a long time two assembeled Broadsides. They were more or less built straight forward. I started with those. Additional parts are a sprue of XV-25 Stealth suits. I need those for their body. Finaly I needed two burst cannons and the multitracker from the VX-8 sprue. The rest is greenstuff, epoxyputty and nails.
For the tools. Something for chopping, drilling, glueing and modeling. See the pics for hints.

Step 2: Torso
Since my models were already assembled I just needed to break them down to their main parts (Hurt myself badly when trying to get the legs off).
I then cut down the body by cutting off the neck, the shoulders and removing the detail on his right breastplate to create ecen surfaces. On this I added some pastic card to heighten the suit a bit.


 Step 3: The XV-25 parts
This is where the void pattern begins. Take the body parts of the XV-25 and seperate the curved part. Cut it in parts as seen in the picture and try to place them on the previously added plasticard. It took me some time to figure out where to cut and even more sanding to get even ends. Be patient and take small steps hence you end up with wasted parts.


Step 4: The head
The head is rather simple. Just take the multitracker and cut off the lowest part as seen in the picture. After that drill holes in the head and the torso and add a pin to the head. Do not yet glue it in place since you wont be able to paint it later on.
You will see that the head follows the flow of the air inlet nicely but you can also choose to turn the head around which gives the model a rather different look.


Step 5: Greenstuff work
The rest of the body is created with greenstuff. Take a look at the pictures to get an idea of what I did.


Step 6: The legs
So. now that I was done with the torso I went on to the legs. While the Void pattern mainly means increased armor (I also did an XV-8) I wanted my broadsides also to represent the Advanced Stabilization System (ASS).
I drilled a whole in the lower limb and inserted a nail to lengthen the legs.
The limbs can be easily reposed by chopping them off and pinning them in place however one likes. I did this on one leg and left the other as it was.
The backpart of the legs is created by using half of a Pulse Cannon form the XV-8 sprue. In the second picture you can see that I cut a piece out of the lower limb to better fit in the Pulse Cannon part.
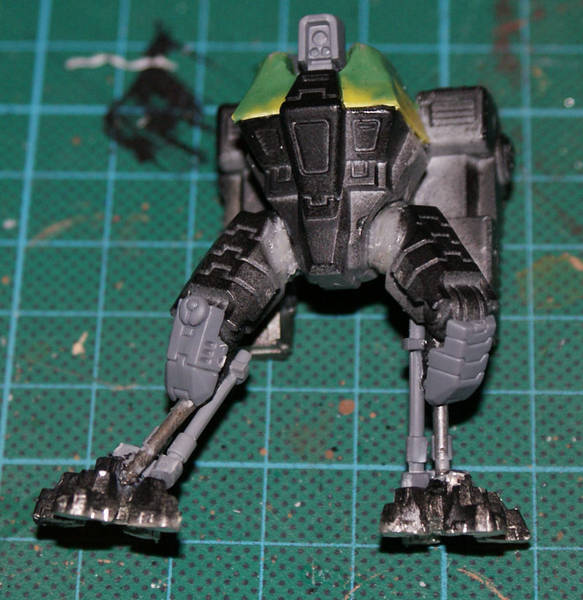
In the third picture you can see the completed legs and positioned t the body on the next shot. Take care at this step because you need to have a more or less even standing with the feet later on.
I cut and pinned the feet so that they formed a unit with legs and body. I repositioned the models several times until I was satisfied with the pose.
The last step on the legs are the kneepads which are simply the shoulderpads from the XV-25 sprue.


Step 7: Guns
Bring in the guns! I opted for shoulder mounted weapons and therefor needed to combine the Smart Missile System (SMS) and the Railgun (RG).
I did this by carving down several parts- take a look at the first picture to see what I did. Afterwards I drilled holes and pinned/glued the SMS and the RG together.
I also drilled holes into the top of the backpacks to place the guns. Furthermore I added a support structure for the big arms. I did this by using the parts of another Pulse Cannon.


Step 8: Greenstuff again
The rest is for details. Greenstuff work was done in the joints of the feet and the knees. Voilla - that`s it.


Comments